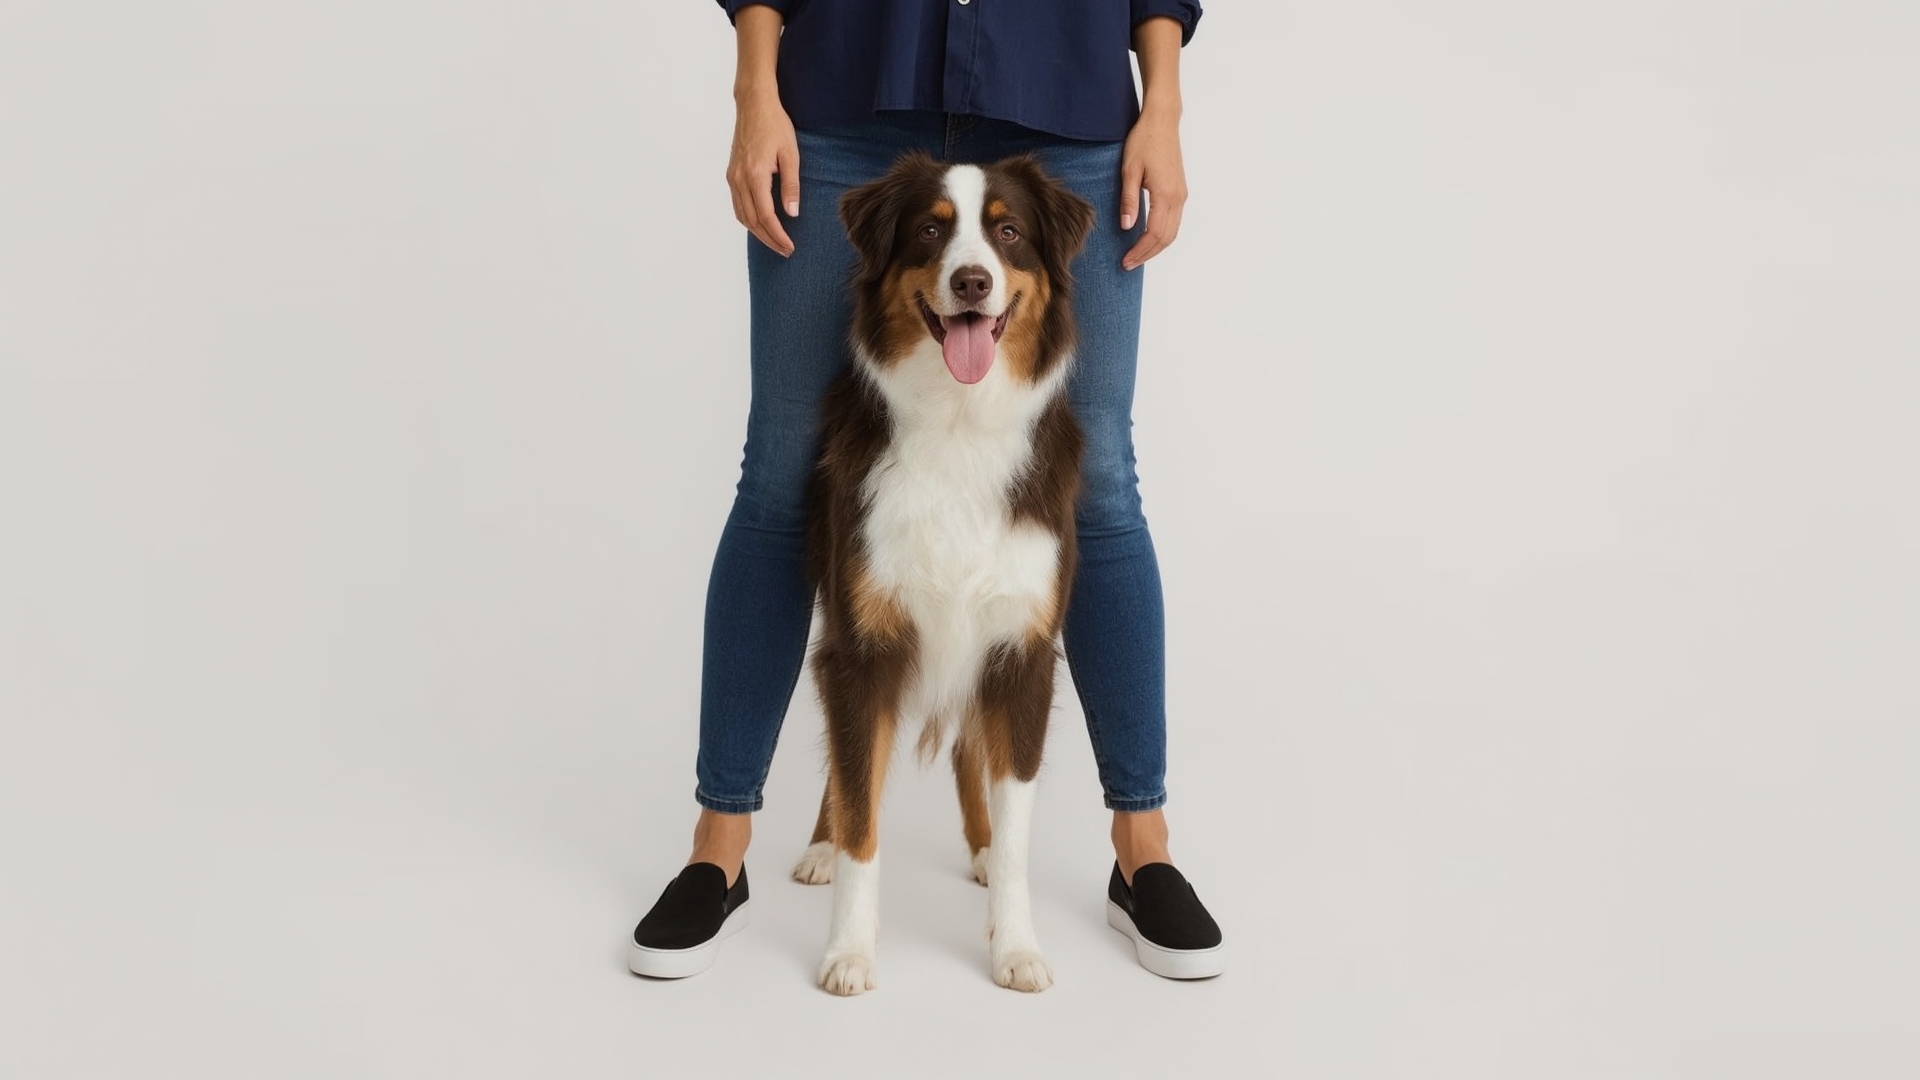
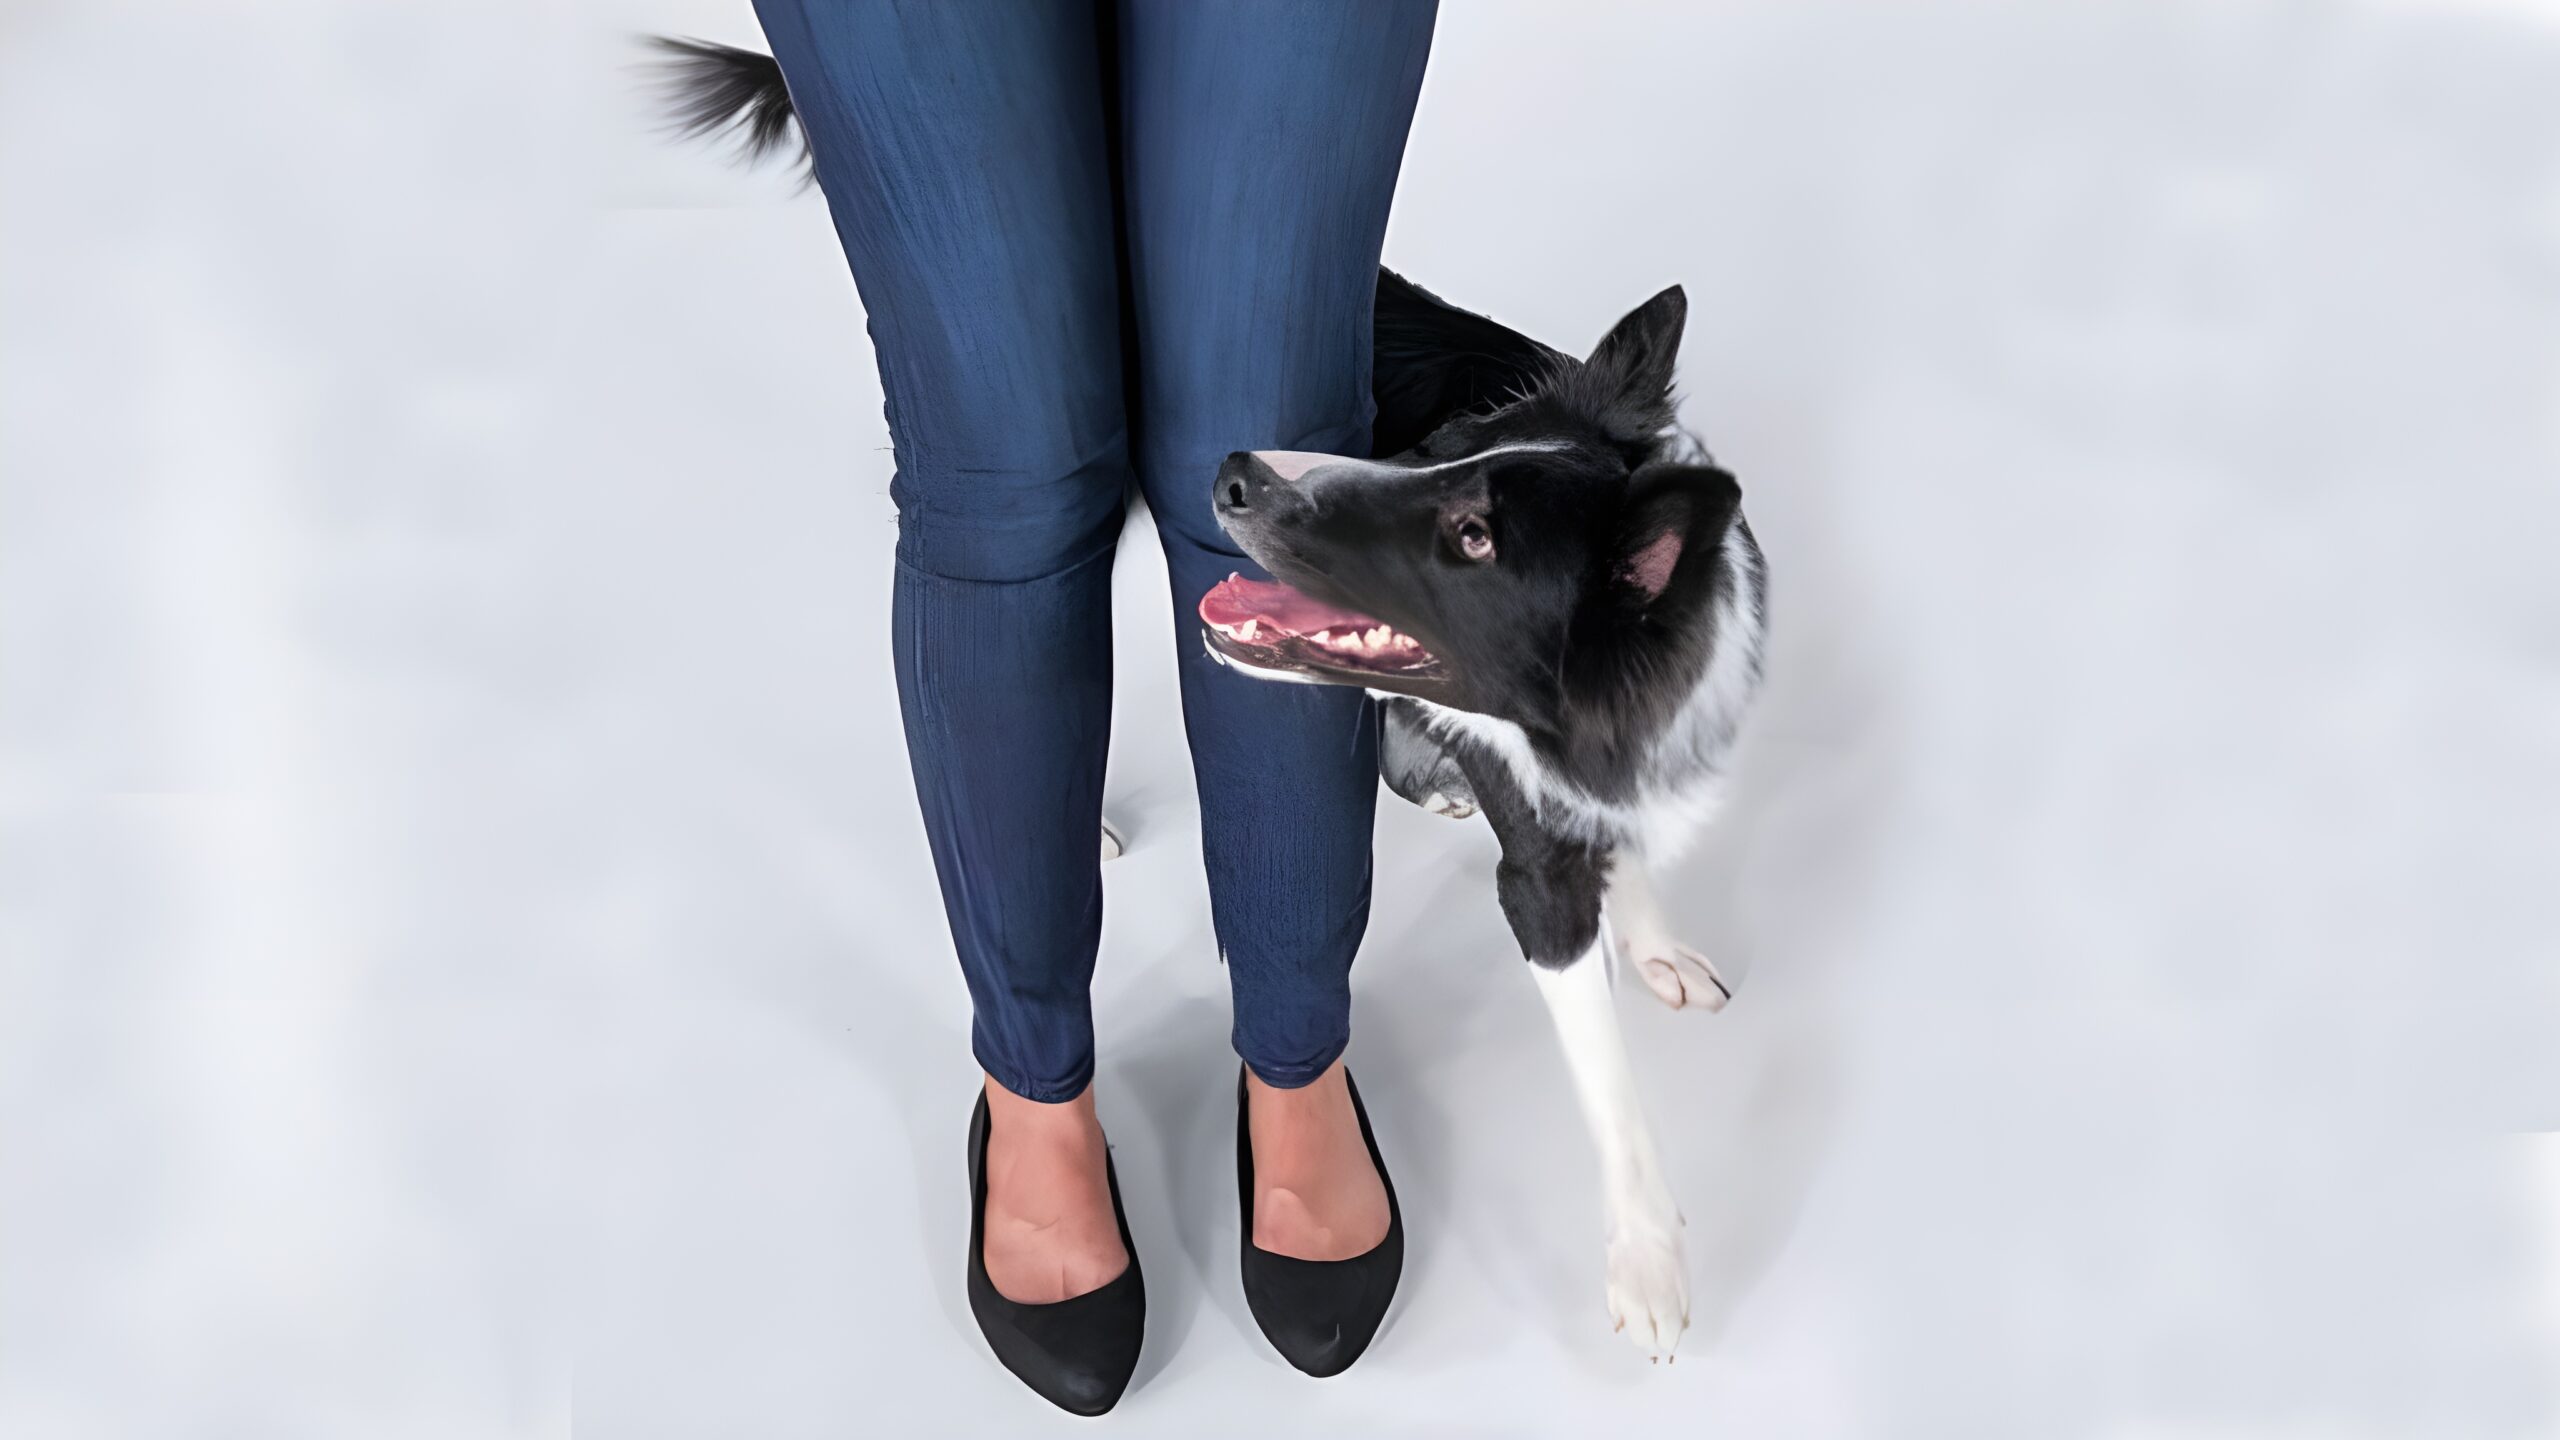
What It Is: Your dog stands or sits between your legs, facing the same direction as you, looking up or forward.
Why It’s Great: This trick builds confidence and teaches your dog to stay close, setting the stage for tricks like leg weaves.
SAFETY Important: Don’t step over your dog. Doing so could be scary or uncomfortable for him.
VISUAL CUE: Step your legs apart and point to the floor between your feet.
VERBAL CUE: “Peekaboo”
PRO TIP: Practice in short bursts to keep your dog comfortable with the close proximity.
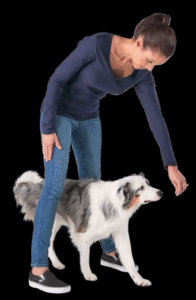
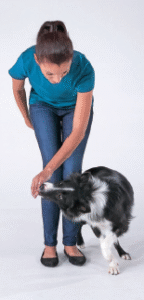
Step 1: Stand with your legs wide apart and your dog in a stand-stay behind you.
At first, you may need to exaggerate how far apart your legs are.
Hold a treat in your fingertips and reach through your legs and toward your dog.
Lure your dog to follow the treat through your legs.
Step 2: Deliver the lure slightly in front of you so that your dog peeks his head through your legs. Name the trick “Peekaboo.”
Step 3: Say the trick name earlier and earlier in your dog’s motion, until you can use the name to start the cue instead of the lure.
Once your dog is fluent with this step, start with your legs a bit closer together.
PRO TIP 1: Plant your feet firmly on the ground. Moving feet can be distracting and can also accidentally step on fur, toes, or tails.
PRO TIP 2: Peekaboo may seem like an easy trick, but going through legs can be scary for some dogs.
If so, drop treats around your legs to reward your dog for getting close, and then start luring through your legs.
If your dog remains fearful, try this acclimation technique:
Take an open stance and have your dog sit behind you. Toss treats around your legs.
As he gets close to you, focus the landing zone of the treats between your legs and then through your legs.
This method may work best if your dog is fearful, because you don’t need to bend over him.
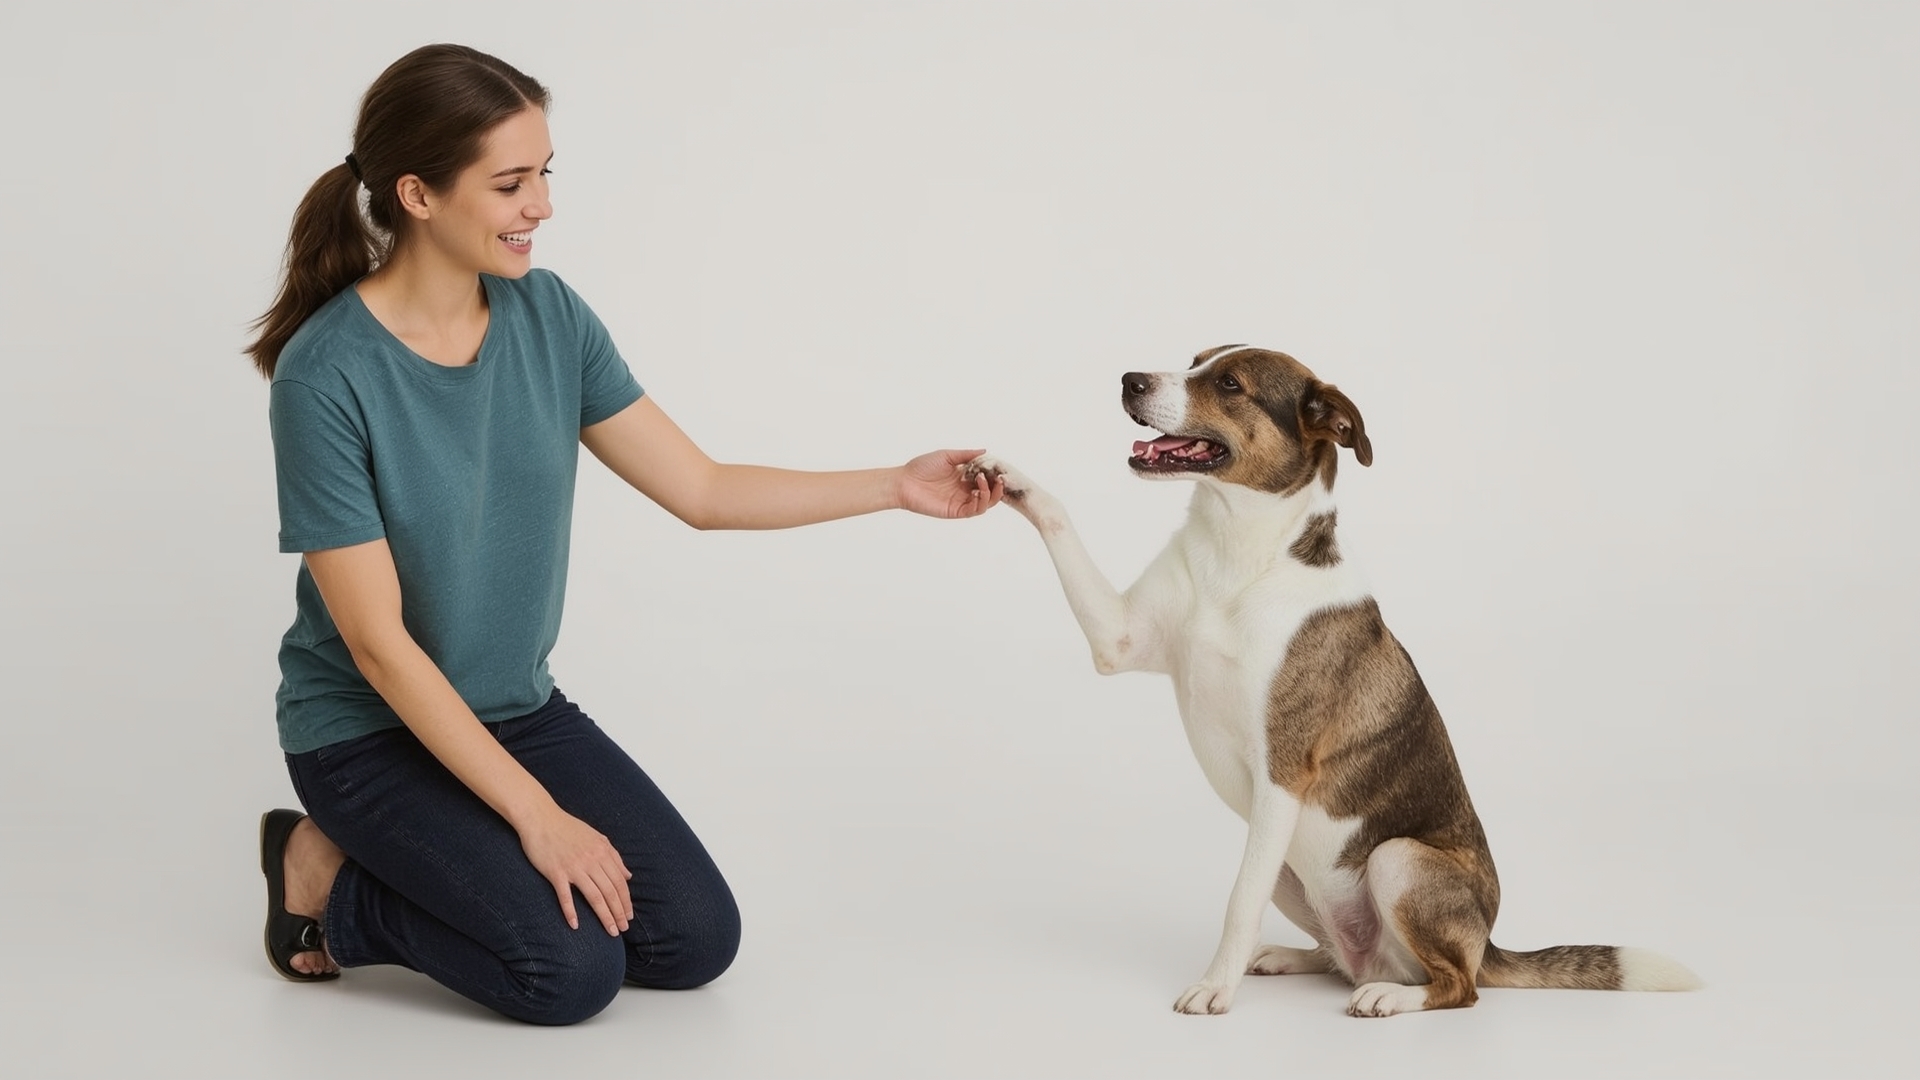
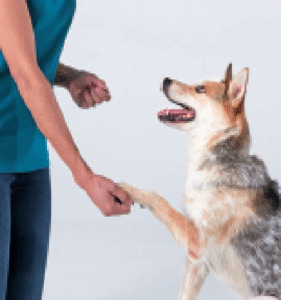
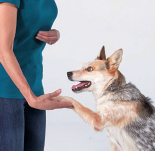
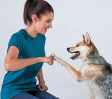
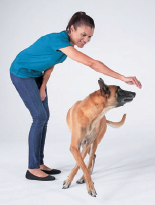
What It Is: Your dog lifts a paw to touch your hand, like a handshake.
Why It’s Great: It’s a classic trick that teaches paw targeting, a foundation for other tricks like High-Five.
VISUAL CUE: Offer your hand.
VERBAL CUE: “Shake” or “paw”
PRO TIP: Use small, soft treats to keep sessions quick and rewarding.
Step 1: Before you begin, discover how paw-oriented your dog is.
Start with your dog sitting in front of you and let her see you put a treat in the palm of your right hand.
Close your fist around the treat and put your fist, knuckles facing up, near her nose.
When she paws your fist, mark it and open your hand for her to eat the treat or toss the treat on the floor.
Don’t give her the treat reward until she paws your hand.
Step 2: Shape the fist touch into a paw shake.
Close your fist around the treat again, and when she paws your hand, mark it, but don’t open your fist.
Instead, give her a different treat with your other hand.
Step 3: Next, put an air cookie in your right hand. When your dog paws your fist, give a treat with your left hand.
Reward only for more deliberate touches directly on your fist.
Step 4: Introduce the hand signal. Now you can open your fist, a little at a time on each rep, until your hand is completely flat.
Remember to reward treats with your other hand. Your right hand, extended toward your dog like a handshake, becomes the visual cue for this trick.
Step 5: Name the trick (shake). Say “shake,” or the verbal cue of your choice, the moment your dog’s paw lands in your hand.
Little by little, say “shake” earlier in her paw motion, until you say it as you begin to extend your hand for the signal.
Step 6: Generalize so your dog can learn Paw Shake in new circumstances. Introduce the visual cue in new settings.
Extend your hand in slightly different directions. Reposition your dog (just a few inches at first), and add more distance with each rep.
PRO TIP : If your dog just stares at your hand, move your closed hand slowly away from her nose to increase her paw-orientation (and earn a treat).
Keep moving it in a circle as you look for her paw to stop your hand from moving. Ideally, she should paw your hand to earn the reward (if so, you’d mark and open your hand).
But if your dog only moves her paw toward your hand, that’s worth a reward at first.
To progress, repeat the hand movement a few times. Then mark and reward for paw touches on
your fist.
Extra Other Trick with Paw Shake
For many dogs, it’s easy to shape the paw shake into a few other tricks.
These three extras involve only slight shaping modifications to the paw shake.
If your dog learns the visual and verbal cue for each one, it’s like knowing three extra tricks.
1. Fist Bump: The only difference between Paw Shake and Fist Bump is in your hand placement, not your dog’s movement.
Keep your target fist closed and move it higher, inch by inch on each rep.
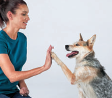
2. High-Five: Like the Fist Bump, the only change is in your cueing hand.
Move your target palm higher, and rotate your palm to face your dog.
3. Paw Wave: Start this variation from the high-five position. Reward your dog as she raises her paw to touch your hand.
At the last moment, slide your hand straight up a few inches as you say “wave,” and treat.
Increase your hand’s distance from your dog’s paw just an inch at a time. Your upward hand motion becomes the Wave hand signal.
PRO TIP 1: Training the other paw to Shake, High-Five, or Fist Bump is like training three completely separate behaviors—your dog won’t automatically understand the switch to the other side of his body.
Use your opposite hand as the target and follow the same steps.
PRO TIP 2: Some dogs are afraid of a raised palm or fist, so give lots of rewards as you patiently acclimate your dog to this visual cue.
Some fearful dogs may prefer to touch a target on your open palm before touching a raised hand.

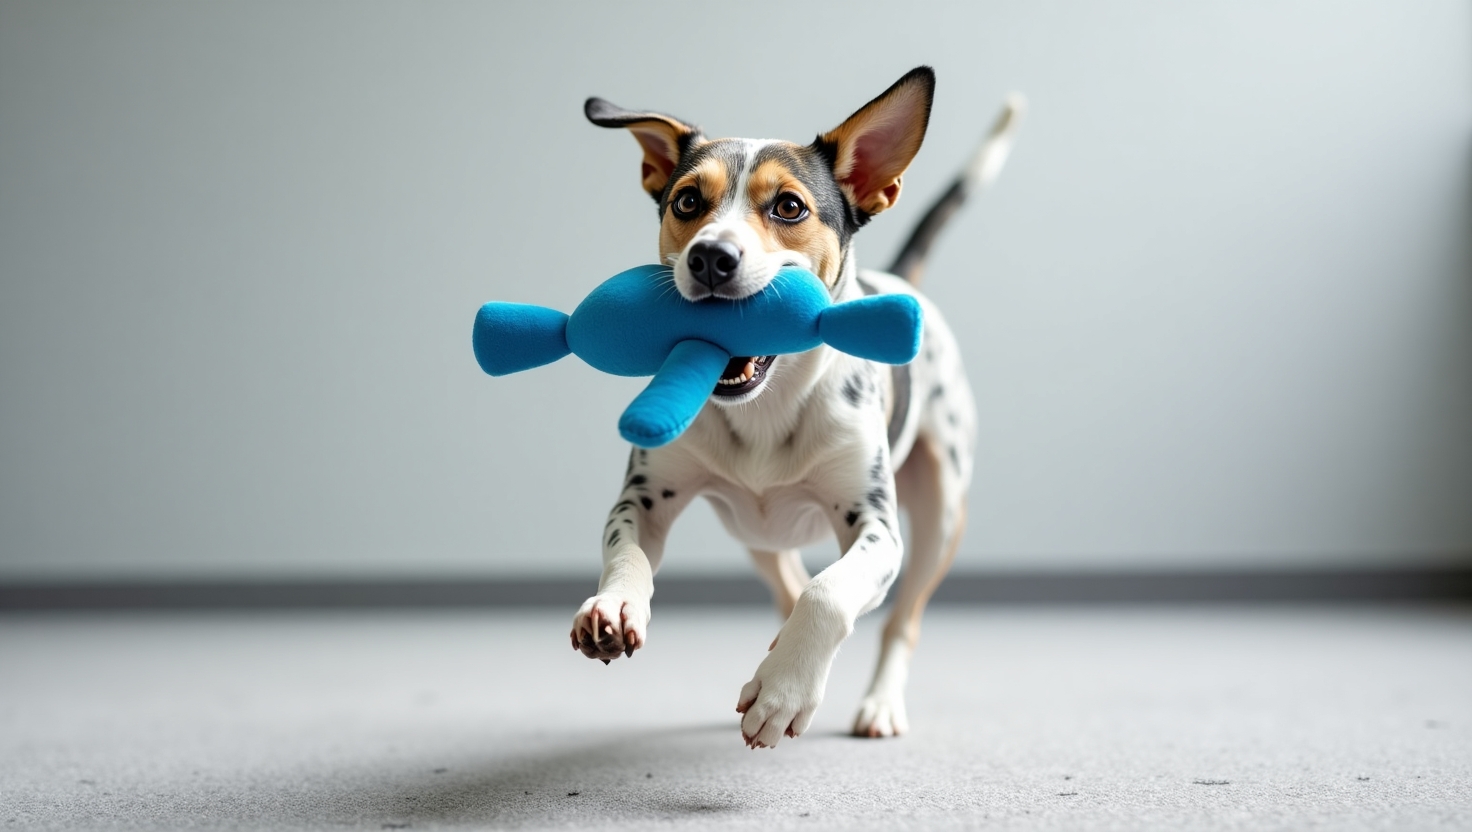
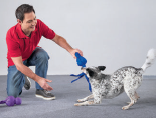
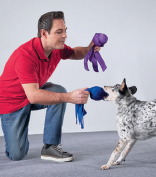
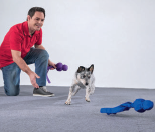
What It Is: Much like Tug and Release, Fetch includes three different skills: get it, bring it, and drop it or give it.
Why It’s Great: Fetch promotes exercise and builds retrieval skills for interactive play.
SET IT UP: You will need two of the same type of toys to teach this trick.
VISUAL CUES
Get it: Toss the toy and point to it.
Bring it: Crouch and bring your cupped hands together.
VERBAL CUES: At first, you’ll use “get it,” “bring it,” and “give it” or “drop it.” When you chain all three, you’ll use “fetch.”
PRO TIP: Start with short tosses to keep your dog successful and engaged.
Step 1: Review Tug and Release). Use two identical toys and review grab it, tug, and drop it, first separately, and then all together on the Tug and Release cue.
When she can do that consistently and she shows motivation and focus, you’re ready for the next step.
Step 2: “Get it.” Once your dog shows some toy drive, tease her with the toy for a few seconds and then toss it gently a few feet away.
The moment she picks it up in her mouth, praise her enthusiastically.
Step 3: “Bring it.” After she gets the tossed toy, call her to bring it: “Confetti, bring it.”
Once she takes a couple of steps toward you, mark, praise, reward her with a game of tug for five seconds, and let her win ( you let go of it).
Step 4: “Give it.” Next, cue her to give it to you. Show her the identical second toy to get her to let go of the first one.
Toss the second toy far enough away so that you can quickly pick up the dropped toy.
Step 5: Put it all together as one verbal cue (“fetch”). Have your dog sit-stay and then toss the toy a few feet.
Then point to it and say “fetch the [name of toy]” or simply “get it.”
If you have a high-drive dog, you may need to keep her on leash until you cue.
When she gets it, say “bring it.” And when she brings it, cue “give it” or “drop it.”
Little by little, increase the distance and phase out the three separate cues entirely.
PRO TIP 1: A common mistake when teaching Fetch is to toss an object and then assume that your dog will automatically go get it.
Before your dog will do that, we must increase her fetch drive, or her desire to bring objects back to you.
Building fetch drive also teaches your dog to play with toys. When you’re building drive, be enthusiastic and let your dog win a lot so she builds confidence and has fun.
PRO TIP 2: While it’s usually easy to train a low-toy-drive dog to drop the toy, it can be challenging to motivate her to pick it up.
These recommendations can improve toy drive: If your dog is more motivated by treats, first reward her for simply looking at or sniffing the object.
Move the toy around and reward her for following the movement. Reward her for touching the object, and give her a jackpot when she mouths it.
Use positive rewards to shape this movement into a hold. When she is consistently picking up the toy, proceed to Step 2.
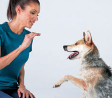
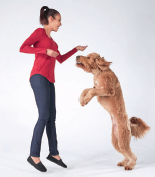
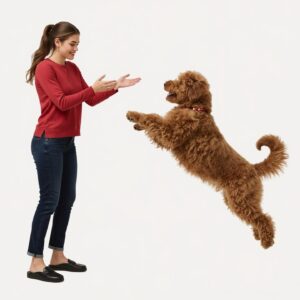
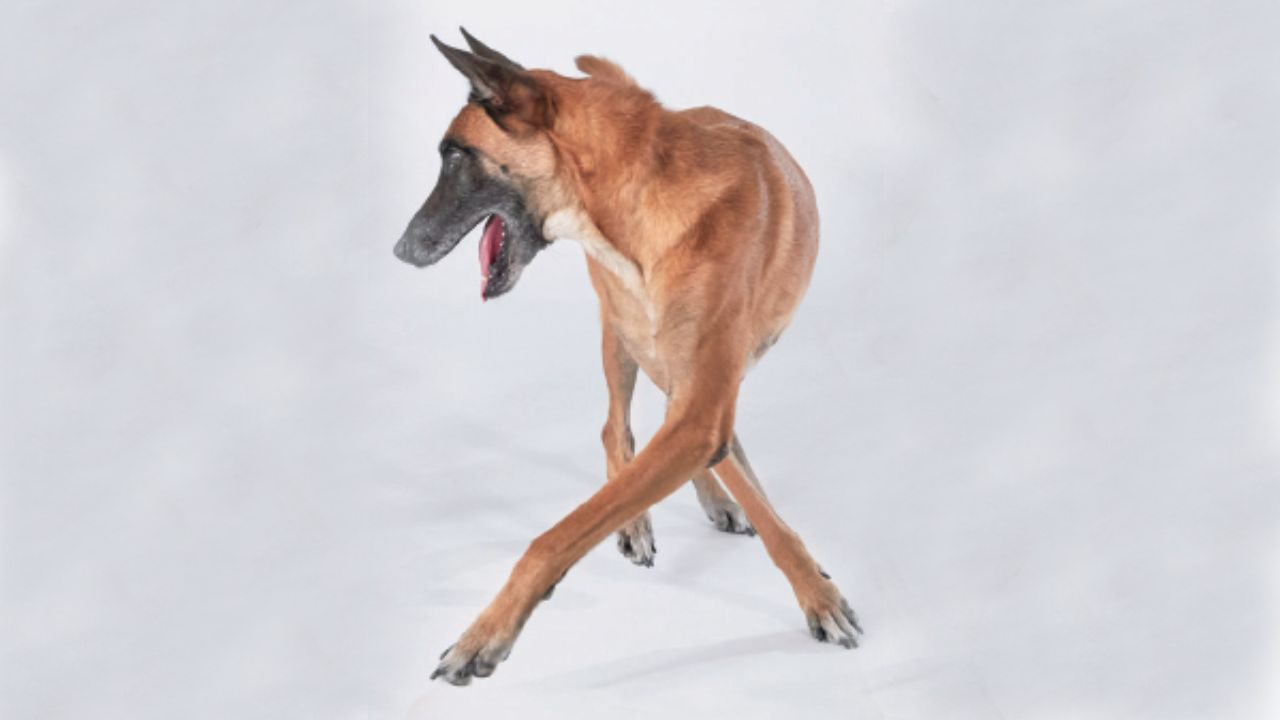
What It Is: Your dog jumps straight up in the air on cue.
Why It’s Great: This trick boosts athleticism and confidence, preparing your dog for jumping tricks.
SAFETY: Don’t do any jumping tricks if your dog has orthopedic issues, including hip dysplasia or partial dislocation (subluxation) of a joint such as the kneecap.
If your dog isn’t fully grown yet (typically eighteen months or younger), don’t have him jump higher than his own elbow height.
If your dog is healthy enough for jumps, it’s best to practice on softer ground, such as grass or a padded floor.
VISUAL CUE: Stretch out your arms and raise both hands quickly.
VERBAL CUE: “Boing” or “jump”
Step 1: With your dog sitting and facing you, hold a treat lure in your fingertips.
Lure your dog to jump. Crouch slightly and then spring up onto your tiptoes.
As you jump, give the visual cue—raise your arms a few inches, as though to give yourself momentum—and say the verbal cue (“boing” or “jump”).
If your dog follows the lure at all, mark it and treat him with it.
Even if your dog doesn’t jump up yet, mark and reward any movement he makes with his head, paws, or body.
Step 2: As you progress, mark and reward for slightly higher attempts to follow your action.
When his front paws lift off the floor, that’s a jackpot. When all four paws jump up, that’s another jackpot.
Step 3: Gradually increase the height of his jump and decrease your own movement, relying more on the hand cue.
Some trainers like to phase out the hand cue and rely only on the verbal cue.
PRO TIP 1: Boing is a trick that many dogs offer. In fact, some dogs jump when we don’t want them to do it.
If your dog is a jumper, capture his behavior: Name it when he does it, praise him, and reward him. Then ask him to jump up: “Spider. Boing.”
If he jumps up, that’s a jackpot. With repetition, you can transform his natural jumping into a cue.
Once your dog follows your cue consistently, you can phase out the rewards.
A good side effect is that your dog will jump less when he’s not rewarded, and many dogs will stop unwanted jumping altogether.
PRO TIP 2: Dogs with high toy drive may respond better if you use a toy instead of a treat as the lure in Step 1.
As a reward for jumping, give him the toy to play with for a few seconds. Then toss a few high-value treats as a trade for the toy.
As he gets the treats, tuck the toy in your waistband behind your back, use both hands for the cue, and then give the toy when he boings.
If your dog doesn’t give back the toy, switch to another behavior that he already knows and finds rewarding, or end the session. Lots of repetitions will build your dog’s trust.
PRO TIP 3: If your dog runs at you and jumps onto you, use a baby gate or low fence to separate you and your dog while you capture this behavior and shape it into a cue.

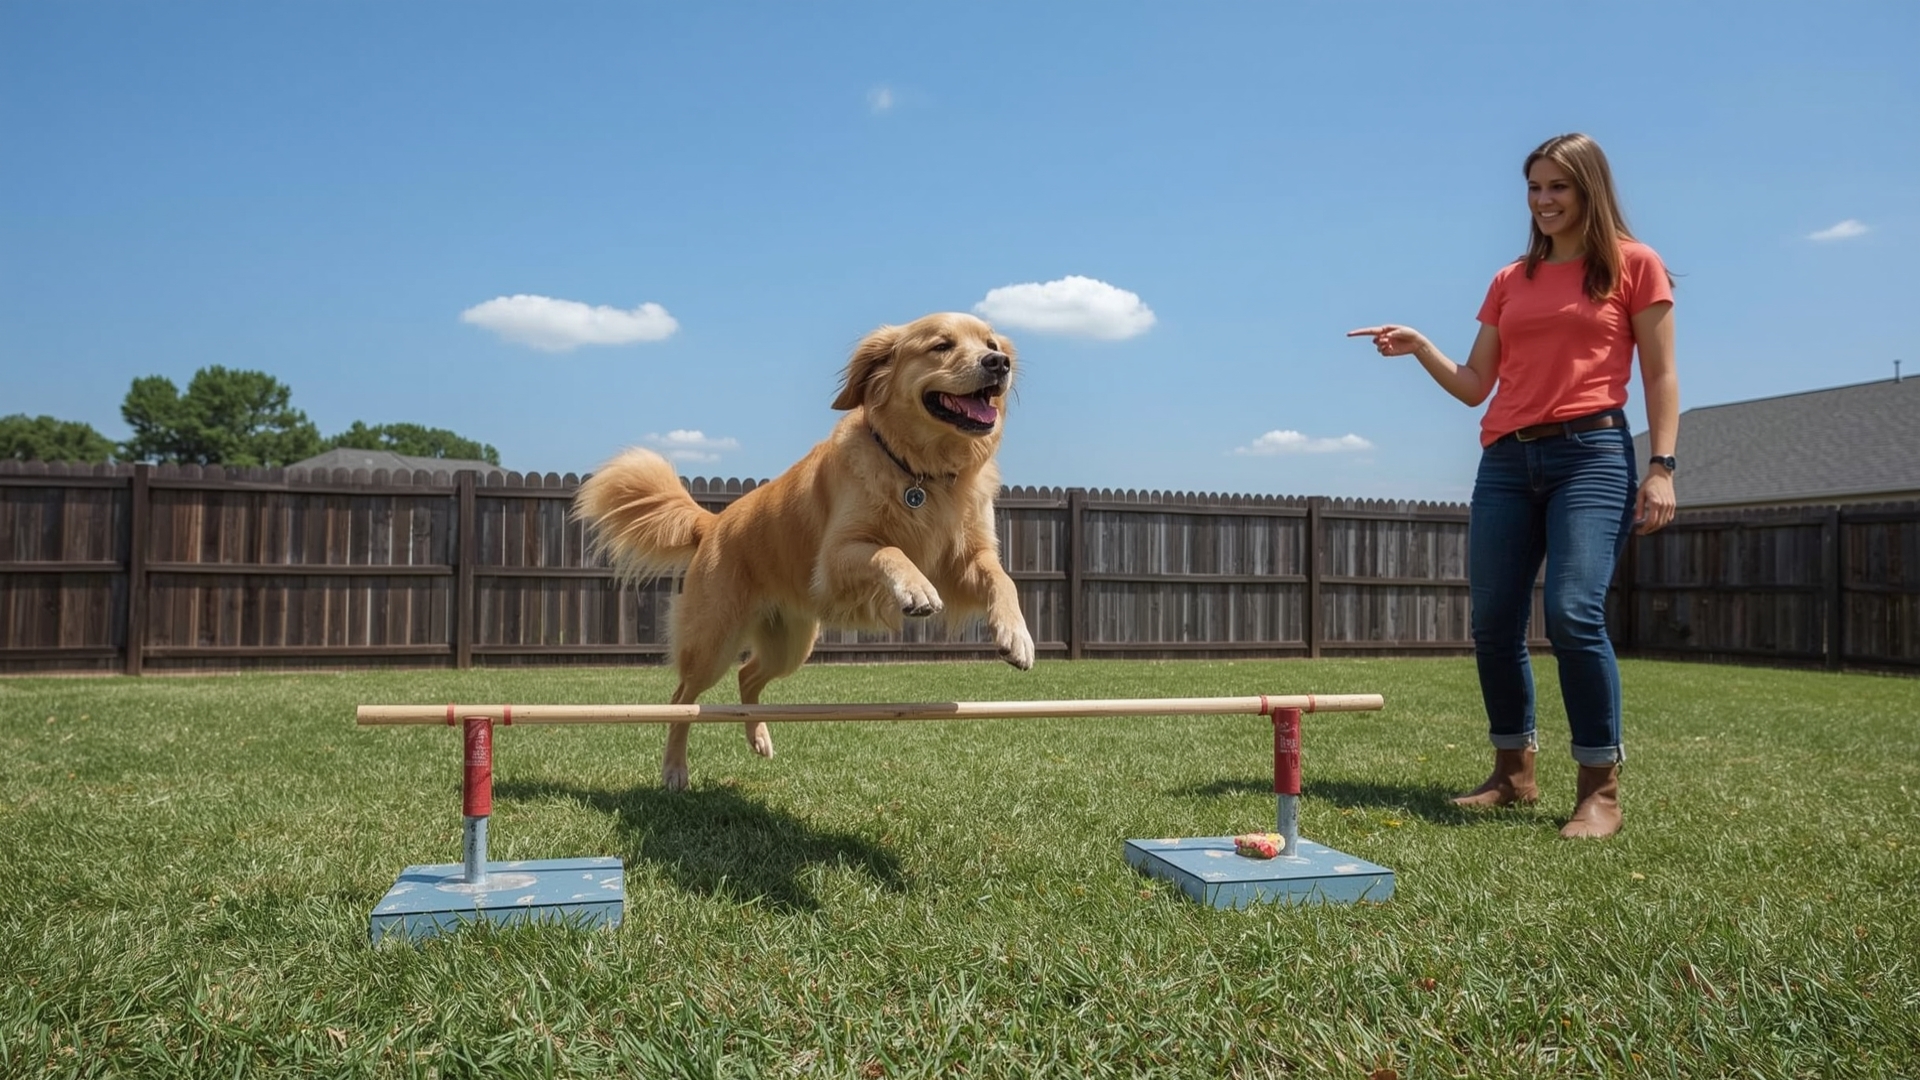
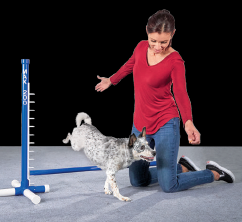
What It Is: Your dog jumps over a low obstacle, like a broom handle.
Why It’s Great: It introduces obstacle navigation, a key skill for agility training.
SAFETY: While you may be curious to see how high your dog can jump, please be safe.
In agility competitions, the highest jumps are only about 24 inches.
Jumping over 50 inches is impressive, and over 60 inches is extraordinary.
High Flying Harley (Chris and Suhey’s Malinois) jumped a near-world-record 68 inches.
SET IT UP: We recommend lightweight plastic jumps that fall easily when your dog hits the bar.
To make your own jump bar, use two stacks of books for the uprights and a lightweight wood dowel or plastic pipe as the crossbar.
VISUAL CUE: Sweep your flat palm toward the jump bar.
VERBAL CUE: “Over” or “jump over”
PRO TIP: Keep the bar low for beginners to avoid strain.
Step 1: Put the jump bar on the ground or on its lowest setting and walk over it with your dog.
It’s fine to use a leash at first. Even if this step seems too easy, it will help your dog acclimate to the jump bar.
Each time, mark it, name it (“over”), and deliver a reward.
Step 2: Have your dog sit and stay facing the bar. Walk over the bar and cue your dog to come to you.
As your dog goes over the bar, say the verbal cue (“over”) again. Mark each successful rep.
Do it from both sides. If your dog is treat-motivated, toss a treat in the direction of your dog’s momentum, or lure your dog to come to you for the treat.
Step 3: Raise the bar just an inch (or less if your dog is young or tiny), and repeat Step 2 from both sides.
After each “over,” raise the bar an inch at a time until the height is up to your dog’s elbow.
Even when your dog knocks over the bar, reward her for effort—it’s more important that your dog builds muscle memory and enjoys jumping.
Step 4: Introduce the visual cue. Stand at the upright. With a flat palm, sweep your arm closest to the upright over the bar.
To send your dog to the jump bar, position yourself farther from the upright and closer to your dog.
Use the hand signal to start each rep, and say the verbal cue “over” when your dog jumps.
If your dog needs a hint, step toward the bar as you begin the hand signal, or toss a treat over the bar to start the send.
PRO TIP 1: If your hand signal was exaggerated because your dog needed luring or extra guidance, shorten the final cue into a crisp motion.
PRO TIP 2: Many dogs need to be lured over the bar. Stand at the upright and hold the treat directly above the crossbar.
As your dog reaches for the treat, pull it forward slightly so that she needs to stretch over the bar to get it.
Deliver the treat on the landing side of the bar. When your dog begins to show confidence in jumping, you can toss the treat as in Step 2.
What It Is: Spins and Twists are 360-degree turns. Spin is clockwise; Twist is counterclockwise.
Luring is the easiest way to teach these two tricks at the same time, alternating directions.
Why It’s Great: This improves coordination and body awareness, perfect for performance routines.
VISUAL CUE: Make a quick, small circle with your hand, clockwise (spin) or counterclockwise (twist).
VERBAL CUES: “Spin” and “twist”
PRO TIP: Alternate directions to keep training balanced and engaging.
Step 1: Start with your dog sitting or standing in front of you and hold a treat in the fingertips of each hand.
Start with Spin (clockwise). With a treat in the fingertips of your right hand, lure your dog in a clockwise circle.
Halfway through the circle (when your dog faces away from you), mark it and toss the treat next to your right foot.
This placement will capitalize on your dog’s momentum to complete the circle and face you again.
Step 2: Next, with a treat in the fingertips of your left hand, do the opposite move:
Lure your dog to Twist, counterclockwise. At the halfway point, mark it and deliver the treat.
Step 3: As your dog becomes fluent with your luring, add the verbal cues “spin” and “twist” when you start each rep. Alternate spinning and twisting.
Step 4: Phase out the lure and instead use an air cookie in the hand you’re using to lure. Deliver a treat with the other hand.
Step 5: Make your luring motions less exaggerated so that each hand motion starts your dog’s spin or twist. Stand up straighter, too.
Keep delivering the reward with your other hand. Good timing and aim will help your dog complete the spin or twist successfully.
Your abbreviated hand motion now becomes the visual cue.
Step 6: Mix directions and add speed. Be less predictable by randomizing spins and twists.
Increase speed by being more enthusiastic and by motioning and rewarding more quickly.
But be careful: Dogs can get dizzy, so don’t spin or twist a dog too many times before pausing altogether.
PRO TIP 1: If one direction is more difficult than the other, then cue more obviously for the less polished direction. Decrease rewards to get more revolutions.
PRO TIP 2: For extra star power, train until you can rely only on the verbal cue.
To give your dog a hint, lean a bit with your hip or shoulder before you say the verbal cue.
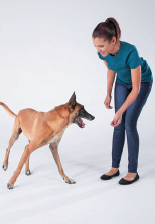
What It Is: This trick cues your dog to walk or run in a circle around you.
Circle is counterclockwise past your left side and ending at your right heel.
Around is clockwise past your right side and ending at your left heel.
However, it doesn’t matter which direction you choose for Circle or Around, as long as you’re consistent each time.
Similar to Spin and Twist you may teach one direction at a time, or teach both at the same time, alternating directions.
Why It’s Great: Enhances movement around you, useful for choreography or daily walks.
VISUAL CUE: Move your hand in the direction you want your dog to go.
VERBAL CUE: “Circle” or “around”
PRO TIP: Timing your hand movements takes coordination, so practice first without your dog.
Step 1: Start with your dog sitting or standing in front of you. Hold a treat in each hand.
Step 2: Teach Circle (counterclockwise to right heel). With a treat in the fingertips of your left hand, lure your dog toward your left side and behind you, switching the lure to your right hand.
As your dog follows the lure, bend your knees and reach your right hand low behind you as you swing your left hand up and out of reach.
Your dog will now be able to follow the lure in your right hand. Smoothly, move your right hand near your right hip and lure your dog to sit at your right heel.
Step 3: Teach Around (clockwise to left side). Reverse the direction:
With your right hand, lure him around from your right heel to your left side, and switch to the left-hand lure.
If necessary, break it down into smaller, slower increments.
Step 4: Name the trick. Say “circle” or “around” at the beginning of each rep.
Step 5: Switch out the lure for an air cookie in the first hand. Keep a lure in the second hand to continue your dog’s momentum to follow it around you and sit at your heel.
Step 6: Abbreviate your luring motion into a hand cue: Start your dog’s movement behind you and then retract your hand.
Phase out the lure in the other hand. Mark it when he completes each rep and reward him with a treat that you’ve hidden in the palm of the first hand.
Step 7: Once he can perform the motion seamlessly, phase out rewards altogether.
Be less predictable—randomizing the cues “circle” and “around.”
PRO TIP 1: If one direction is more difficult than the other, then cue more obviously and slowly for the less-polished direction.
PRO TIP 2: As your dog is first learning, help him gain confidence by dropping treats at your heel.
Praise him for getting the treats. Then cue or lure him to sit in front of you to begin the next rep.
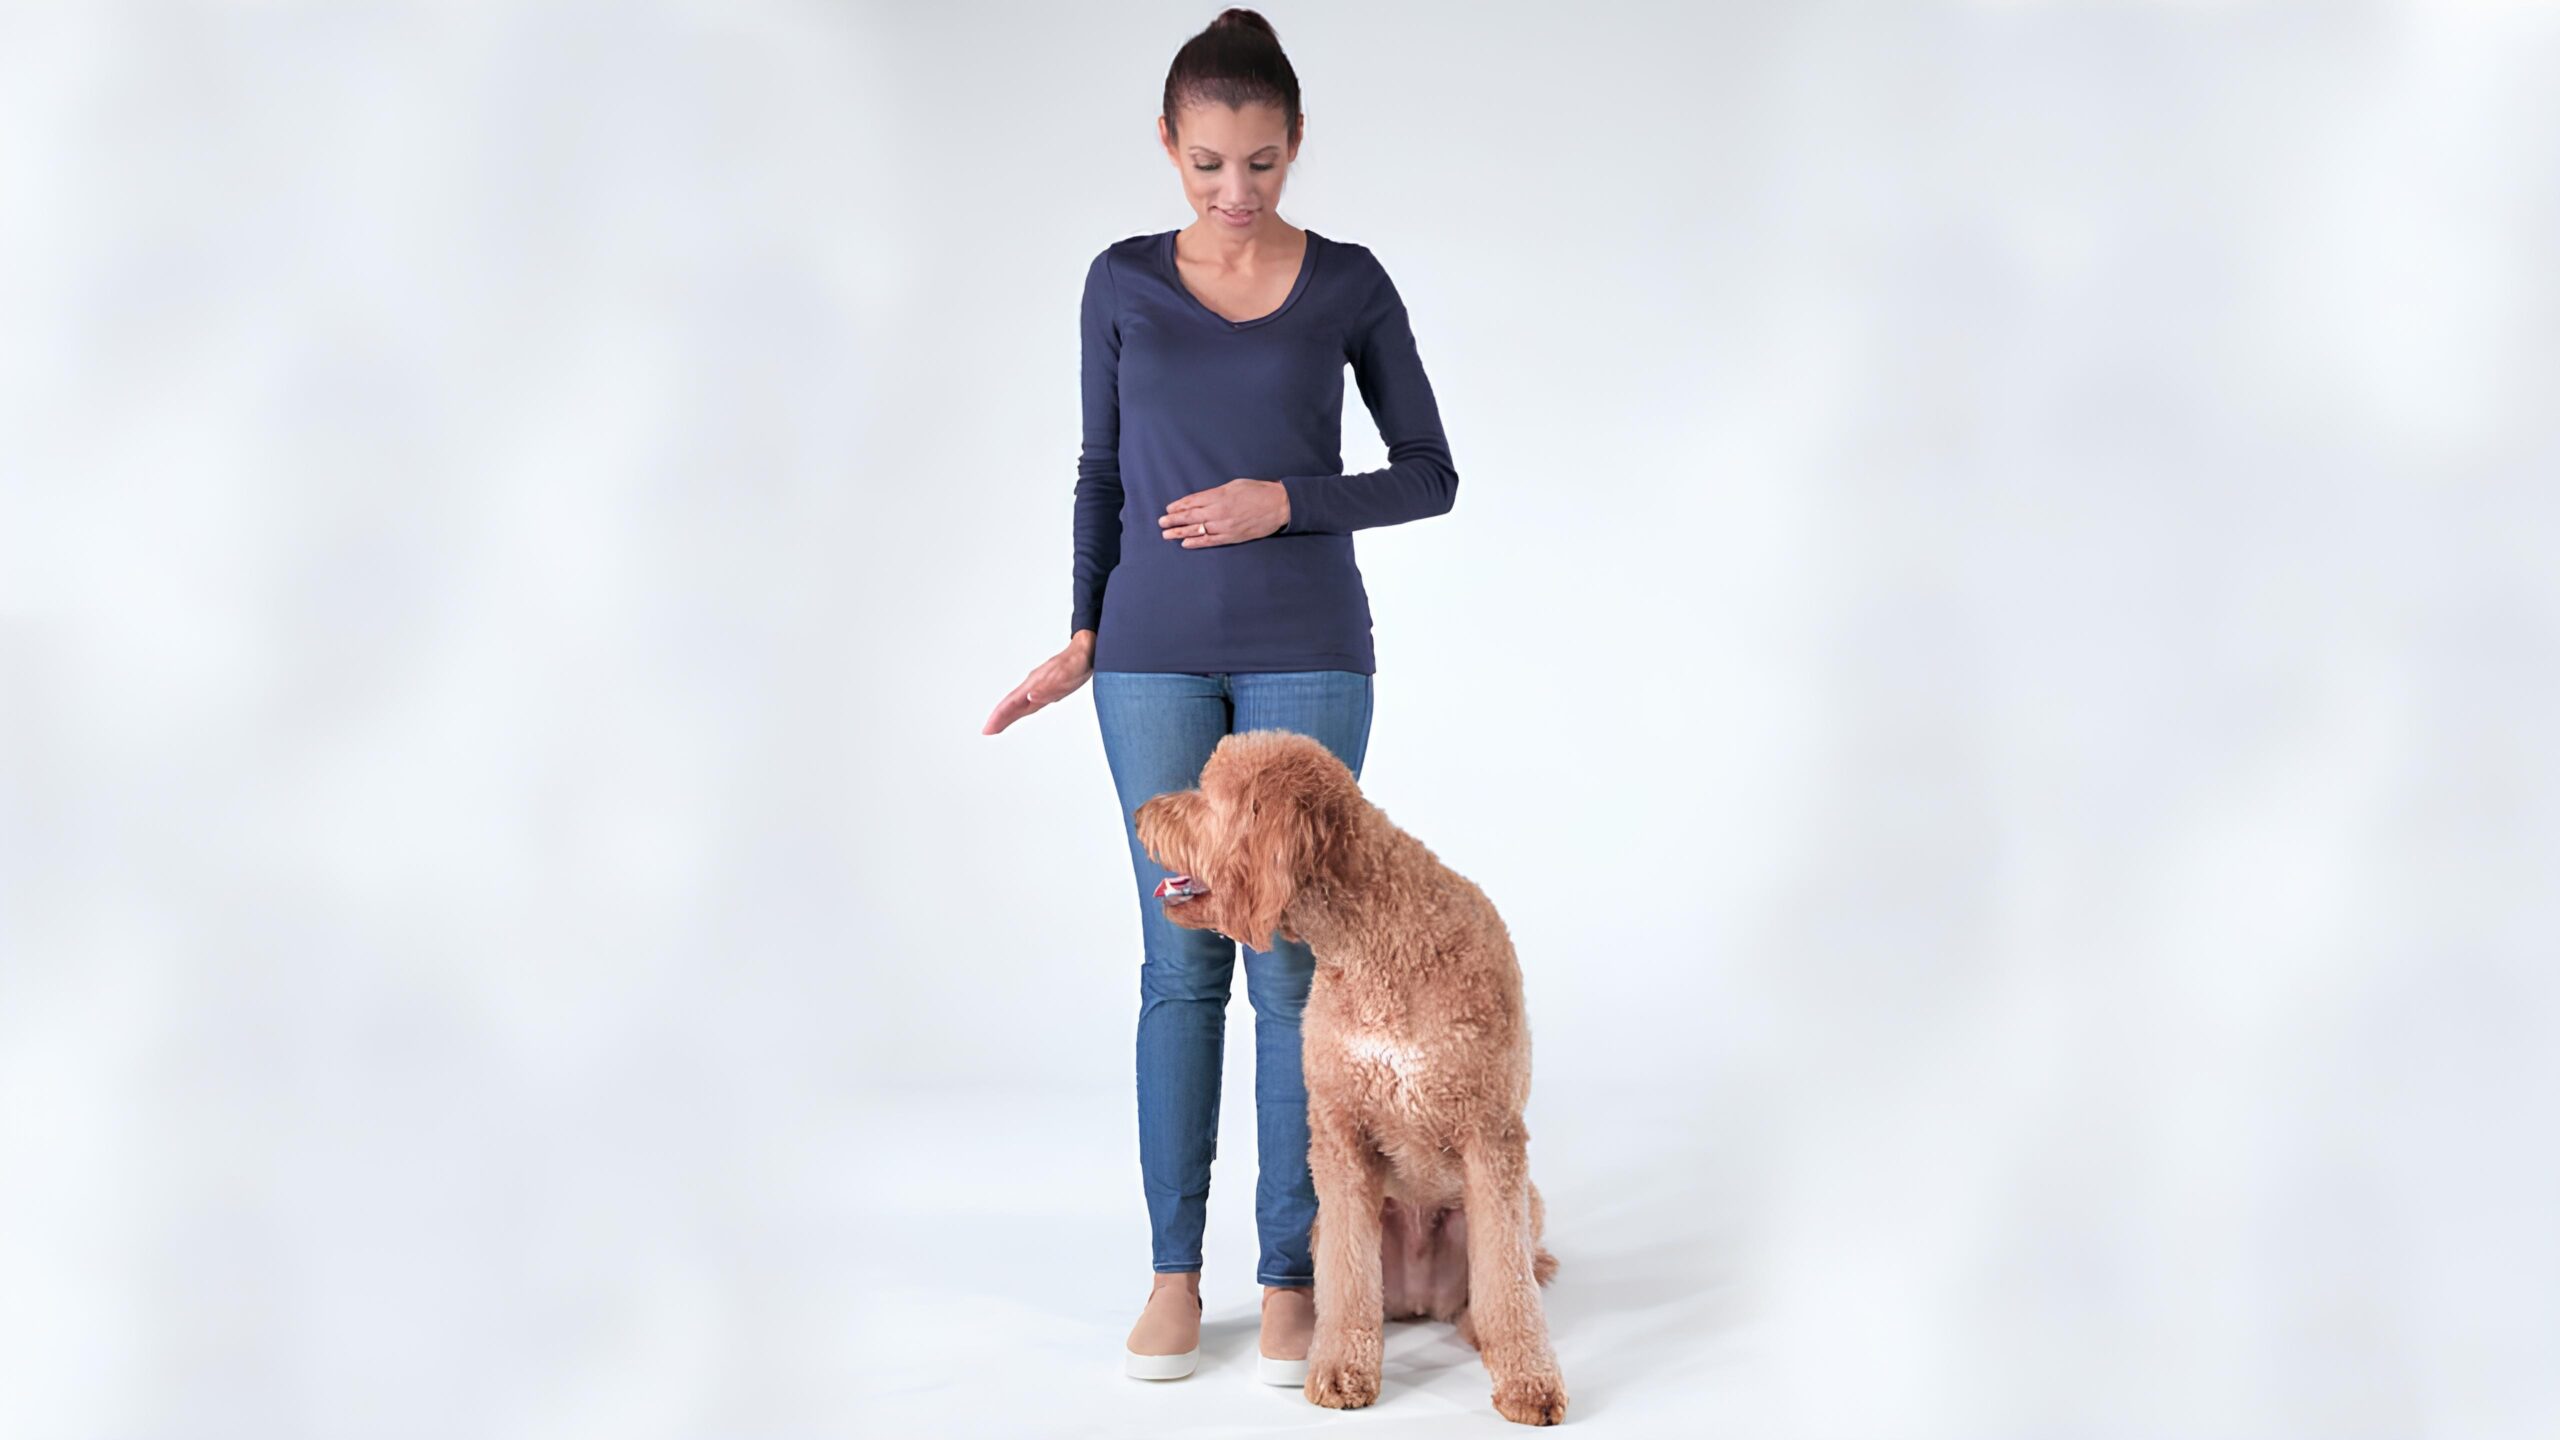
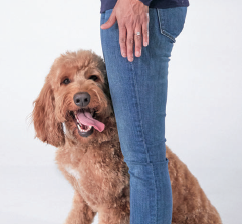
What It Is: Your dog sits at your heel (left side) and switches to sitting at your side (right side), and vice versa.
Why It’s Great: Teaches positional awareness, great for advanced routines or walks.
VISUAL CUE: Pat-pat your hip.
VERBAL CUE: “Heel” (left hip) or “side” (right hip)
Step 1: Review Circle and Around. Finish with a sit at your left heel and alternate on the next rep to sit at your right side.
Continue alternating. You may lure him into a sit at first.
Step 2: Mark, reward, say “heel” (left) or “side” (right), and pat-pat your corresponding hip, lure him across, and finish with a sit.

Step 3: Pat-pat your hip, then lure him to that side/heel. You might have to lure him around in front of you to back him into the right spot.
When he commits to that side/heel, pull the lure to your hip, pat-pat that hip again, and say the verbal cue.
Next, substitute an air cookie; when he sits at the correct side/heel, mark it, and use your other hand to deliver or toss a treat.
Delay the mark and treat up to two seconds total.
Step 4: Phase out the rewards. Don’t mark each rep.
Increase your dog’s response speed by cueing him to your opposite hip as soon as he sits.
PRO TIP: After some of the reps reset your dog to sit in front of you.
Adding this new position will make your next rep less predictable, which causes your dog to pay closer attention.
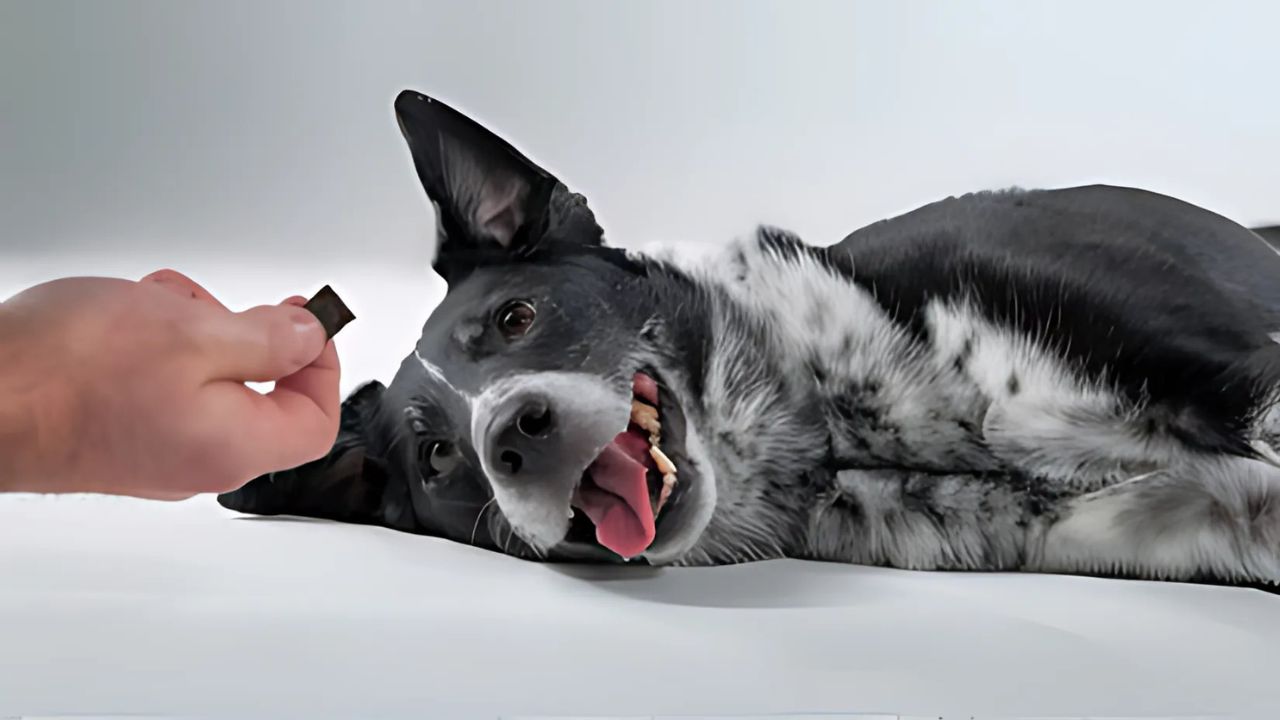
What It Is: Your dog rolls onto her side with legs outstretched long.
Why It’s Great: The Time Out trick teaches your dog to relax on their side, promoting calmness.
It’s a fun way to build trust and prepare for more advanced tricks like Belly Up.
VISUAL CUE: Turn your hand over—palm up to palm down.
VERBAL CUE: “Time out,” “take a time out,” “lie,” or “down lie”
Step 1: Choose a hip for your dog to roll onto to learn this trick. Kneel beside your dog and ask her to lie down.
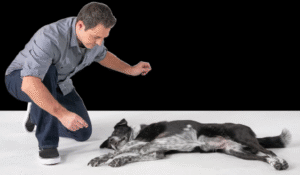
Step 2: Lure your dog from down (her head is up) to lying on her side (her head and body are flat on the floor) by showing her a treat close to her face and then luring smoothly toward her shoulder so that her head follows.
It’s fine to mark and reward for increments: if her hip flattens, or if her shoulder leans on the floor. Finally, she will be fully on her side.
Step 3: Name the trick “Time Out” or ask her to “take a time out.” Trainers also call this “Lie” or “Down Lie.”
Step 4: As your dog associates the trick name with the movement, add the visual cue.
Little by little, stand up and deliver the cue from a distance.
PRO TIP: Dogs naturally take the Time Out position, so this trick can be a great way to practice capturing.
Whenever you see your dog lying on her side in the Time Out position, mark it, name it, and reward her.
If she experiments to try to earn another treat, mark it and reward her for any attempt in the direction of her Time Out side.
As you free-shape your dog’s movements and she begins to understand that you want her to roll to a specific side, delay marking and rewarding until she moves closer to the correct side and position.
When she lies down on that side completely, give her a jackpot.